Color Grading, LUTS and FilmConvert
One of my biggest challenges is Color Grading. For those who don't know, I'm sure you've already seen the results of color grading in your favorite movies, and it's used everywhere from television and feature films, to commercials and (you guessed it,) web videos and independent movies. Wikipedia defines Color Grading as "...the process of altering and enhancing the color of a motion picture, video image, or still image either electronically, photo-chemically or digitally."
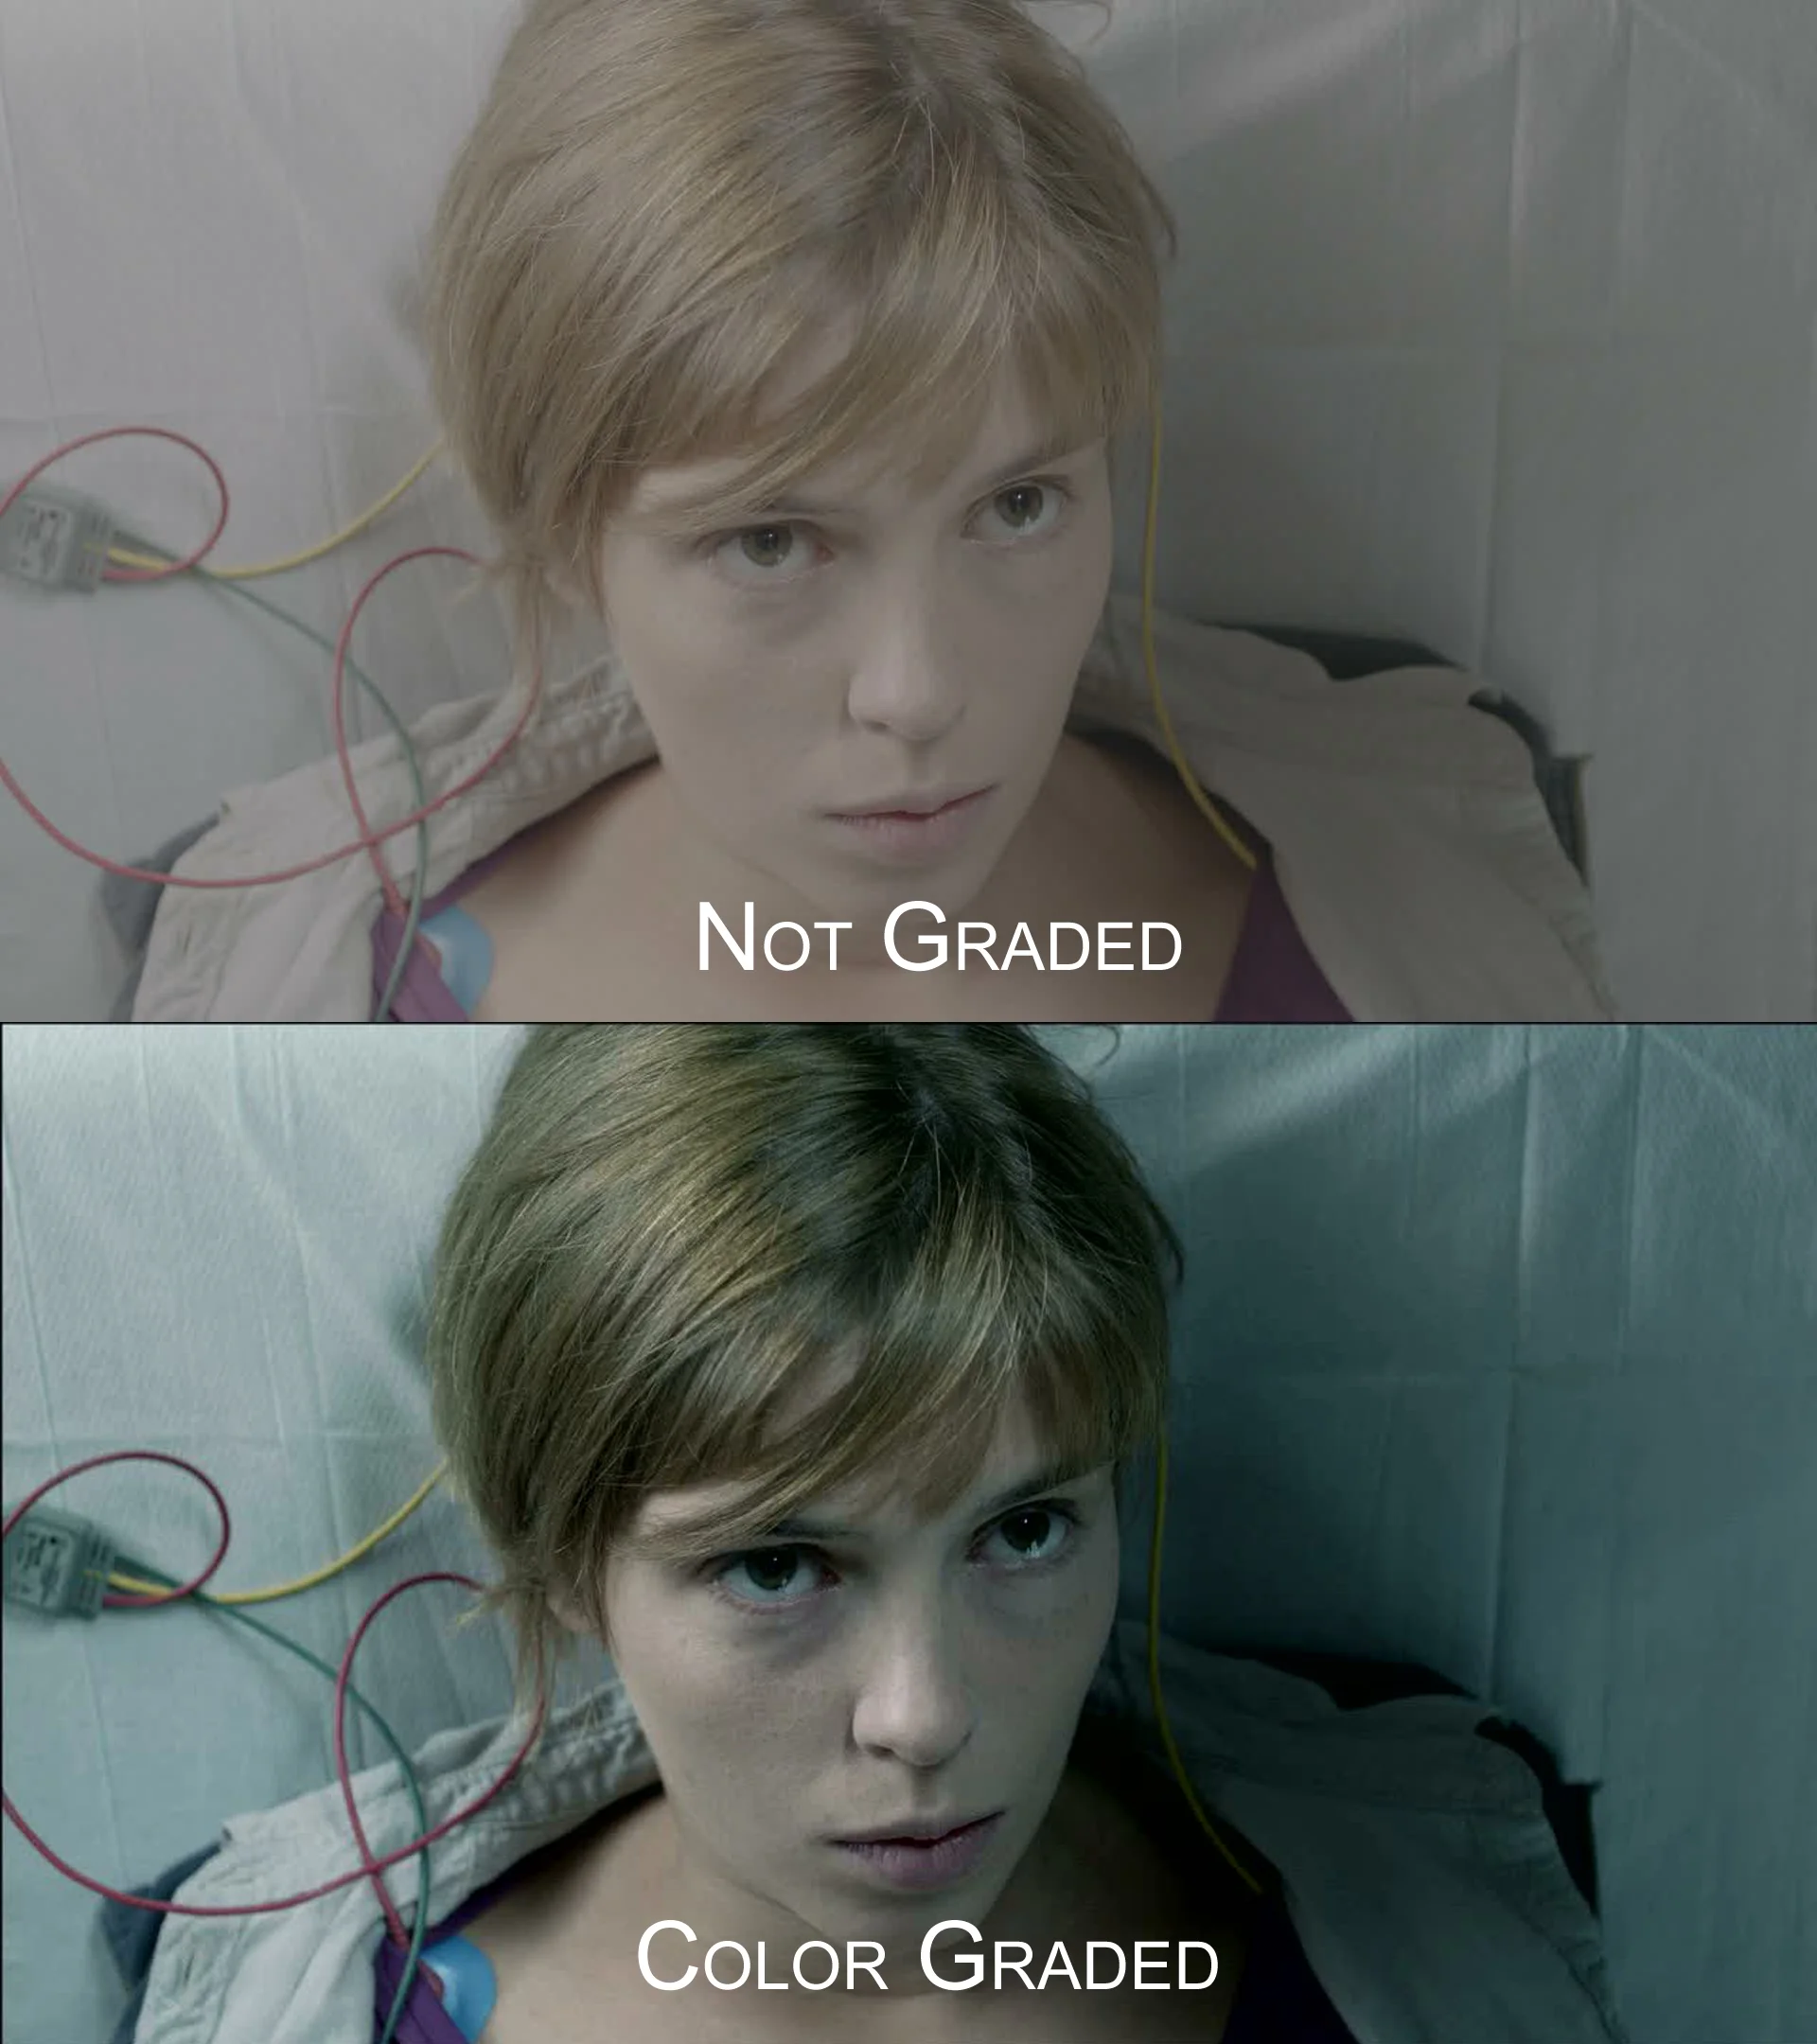
An example of Color Grading
Color Grading is one of the most important steps to define the look of a film. The Wachowskis loved to use green hues to portray the artificiality of the false world in The Matrix, and 300 went a little nuts with their grading in the warm yellows, oranges and reds showing the heat of battle.
At the end of the day, Color Grading is one of the visual effects that many viewers never know they're watching, yet the technique does an enormous job of setting the tone of a scene. For example, along with camera angles and lenses, Color Grading can be used to make a scene feel warm or cold, or eerie or pleasant. Cool greens and blues can trick your mind into thinking a room is cold or sterile, while warms oranges, browns and yellows can make you think you're watching something happening in the middle of summer in Mexico. Understanding color theory is a big help here, and it's seen everywhere if you know where to look for it.
Needless to say, it takes a whole lot of trial and error, research and intuition to pull it off well. Most non-linear editors like Premiere and Final Cut have integrated basic color grading solutions, but there are also some stand-alone software packages like DaVinci Resolve and SpeedGrade that have more latitude. Two things that I've recently discovered are LUTs and FilmConvert.
LUTs
I had heard about LUTs a while ago from a friend enrolled at Vancouver Film School. LUTs, or Look Up Tables do a great job of taking the footage that you have, and adapting the color information to fit predefined specifications. For example, as there is a large demand to emulate film stock when using digital cameras. There are many film stock LUTs that will take DSLR footage that was shot in a particular picture style and convert the look to something that looks more like it was shot on a film camera. Two popular ones are OSIRIS and ImpulZ.
The cool thing about LUTs are that you can pick a style, do some and then do some quick color correction on top of it to achieve the look you're going for. Additionally, you can use them in Photoshop as well for still images, or just to test out what the end result will be without going into your editor and messing with the footage.
One of the drawbacks is that aside from the secondary color correction, you don't have much leeway in changing the overall look. The changes are intrinsic to the specific LUT, so you have to find one that you like and work with it.
One last note about LUTs: they don't have to be film stocks. If you're working with a colorist, or you're doing the color grading remotely, you can color grade your footage, and then export a LUT that you can send to the editor, thus removing the hurdle of color grading in a location that you may be nowhere near. The one caveat is that any new changes to the LUT have to be done by the author, and re-exported.
FilmConvert
I had heard about FilmConvert a few months ago, but didn't feel like I'd need to have another piece of software. Now, I'm very surprised at how I tried to grade without it. FilmConvert has the same result as LUTs, but the method of arriving at them is different. Instead of a predesignated look, FilmConvert will allow you to customize the look to fit the film appearance and add grain. It also allows you to chose the camera that you shot the footage with, the model, and picture style. It's a great way to learn more about what changes will bring forth what results, but may not be as quick as throwing a LUT and some secondary grading on your footage.
Here's an example:
Both of these methods are great for making your DSLR footage look like it was shot on film, but as always, it'll come down to understanding what look you want before you start shooting, taking time to light correctly, use the right lens, and the right movement. If you want to give either of these methods a shot, there's a free demo of FilmConvert on their website, and you can download some free LUTs from this website, and use the Lumetri plugin in Adobe Premiere. For more information about Color Grading in general, check out Color Grading Central.
Have you ever used LUTs or FilmConvert before? If so, sign off in the comments!